Lesson 19.11.25
Print on Demand
Input
Print auf Verlangen
Franzi & Tim
Why POD?
Lenny & Clara
Production Process
Kristina & Edda
Print Wikipedia
Johanna & Sooryeon
Franzi & Tim
Lenny & Clara
Kristina & Edda
Johanna & Sooryeon
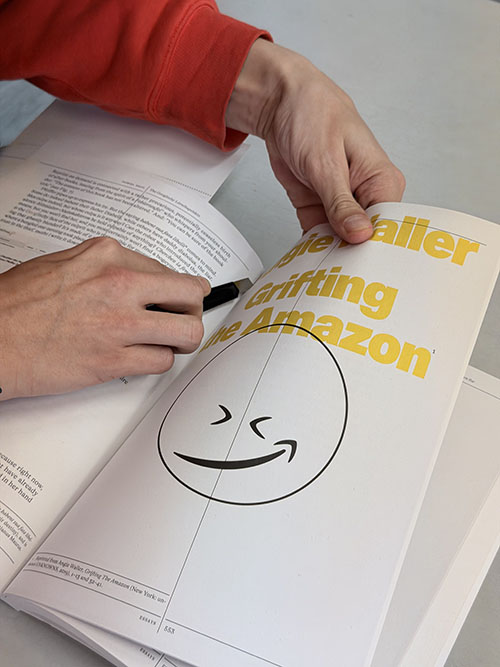
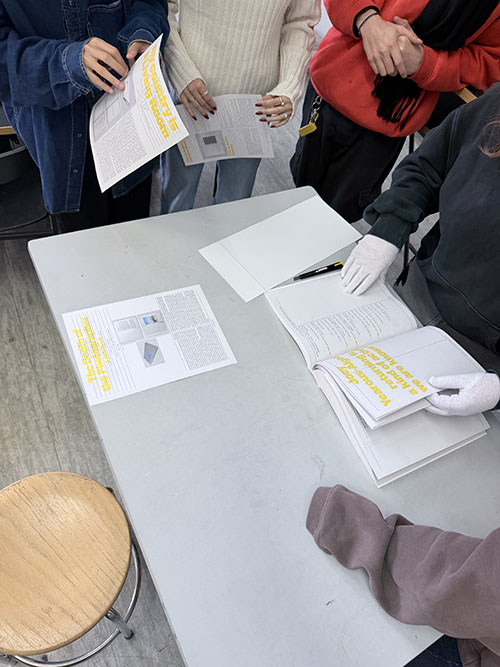
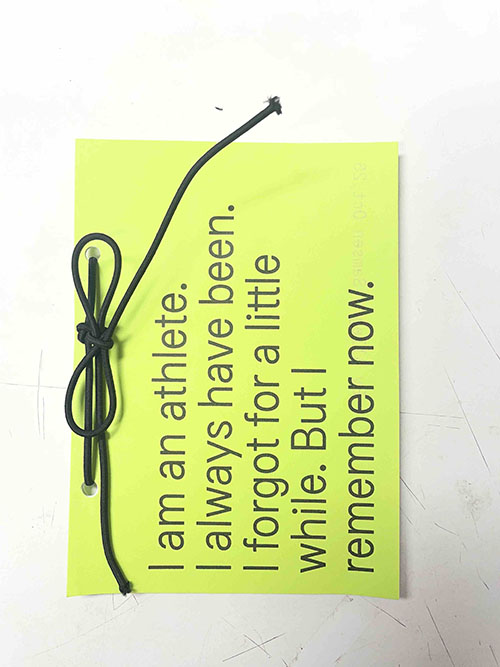
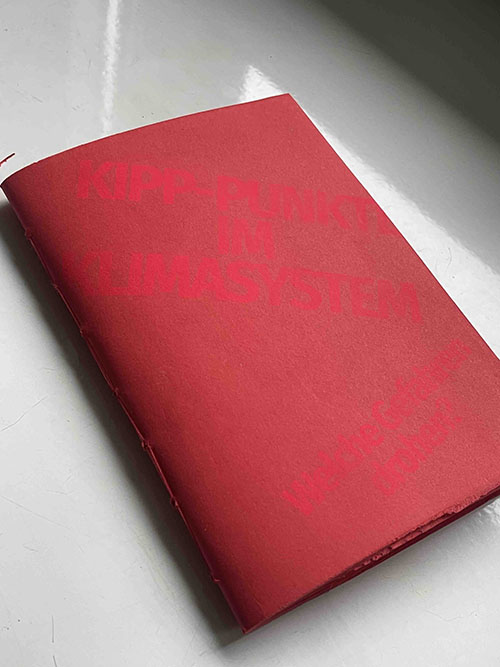
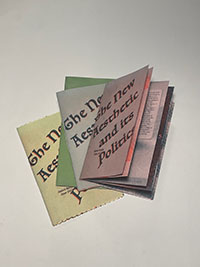
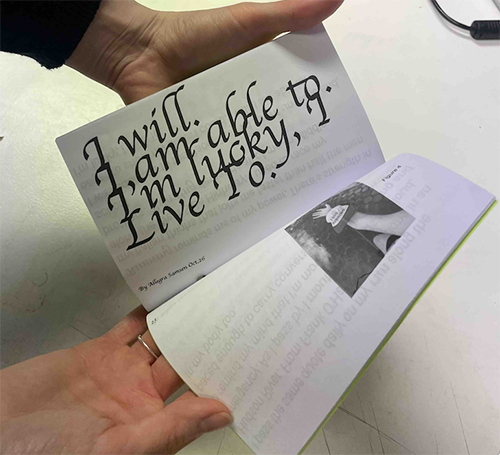
Cut out (as a group assignment) an essay from the publication “Library of Artistic Print on Demand” and at least 4 examples of artistic works.
Rebind the pages.
Read the text and prepare 4–5 slides on the most important insights from the essay, making it accessible to others.
Why is print on demand interesting?
How does print on demand work?
How can print on demand be used artistically and creatively?
Think about how you could implement a print on demand project (within the infrastructure of the university) and how it could be well implemented in terms of design.
1 PDF as a group, please
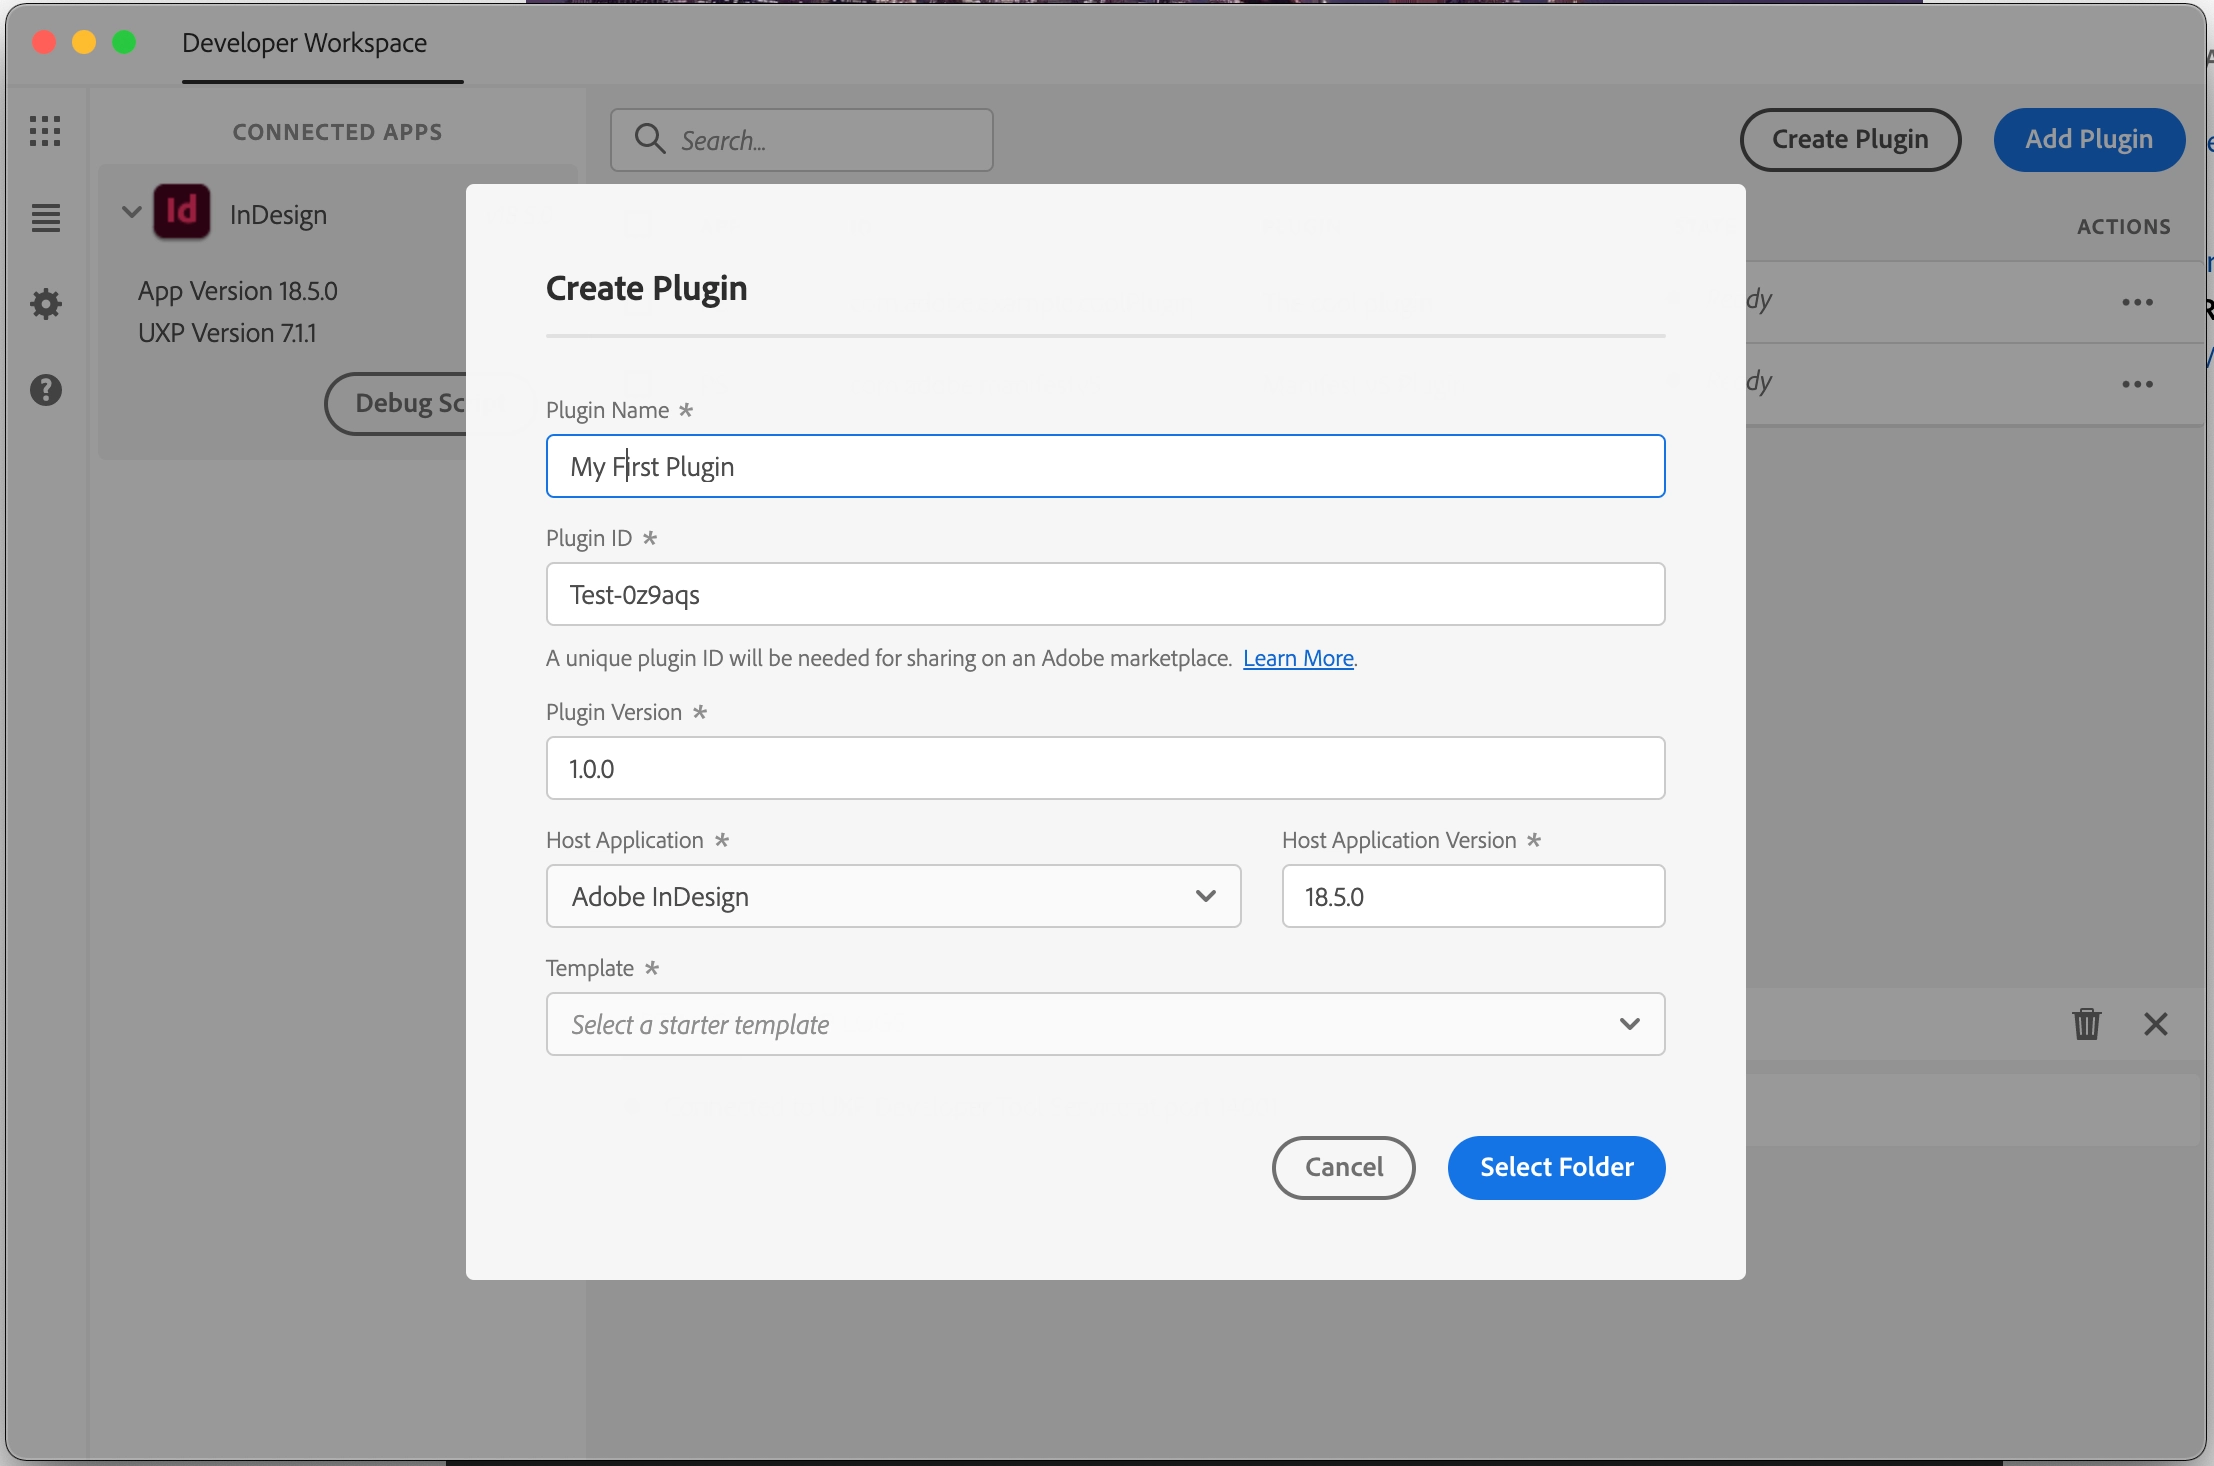
Adobe Cloud Abo :((((
UXP Developer Tools, you can download from the Adobe Cloud
VSCode
A Laptop with Indesign installed
In the UXP Dev Tools click create plugin
My First Plugin

                            ├── manifest.json

                            ├── index.html

                            └── index.js
You can click run and watch to test it
In the index.html you can add elements:
<div class="wrapper">
                                    <h3>Hello World!</h3>
                                    <button id="btnCreateText">Create Text</button>
                                </div>
There are two types of entry points:
commands and panels.
Commands are "run and forget" entry points that are invoked by the user, such as a menu item or a keyboard shortcut.
Panels have a panel that can be opened by the user from the UI. The user can then interact with the panel.
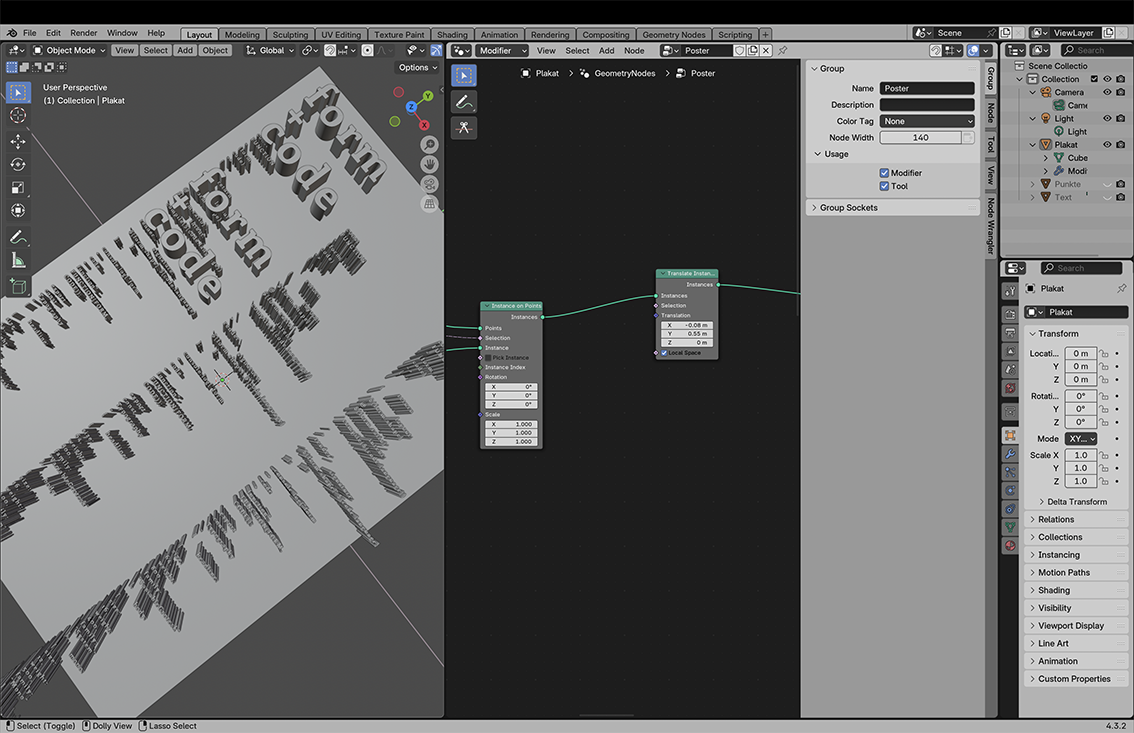
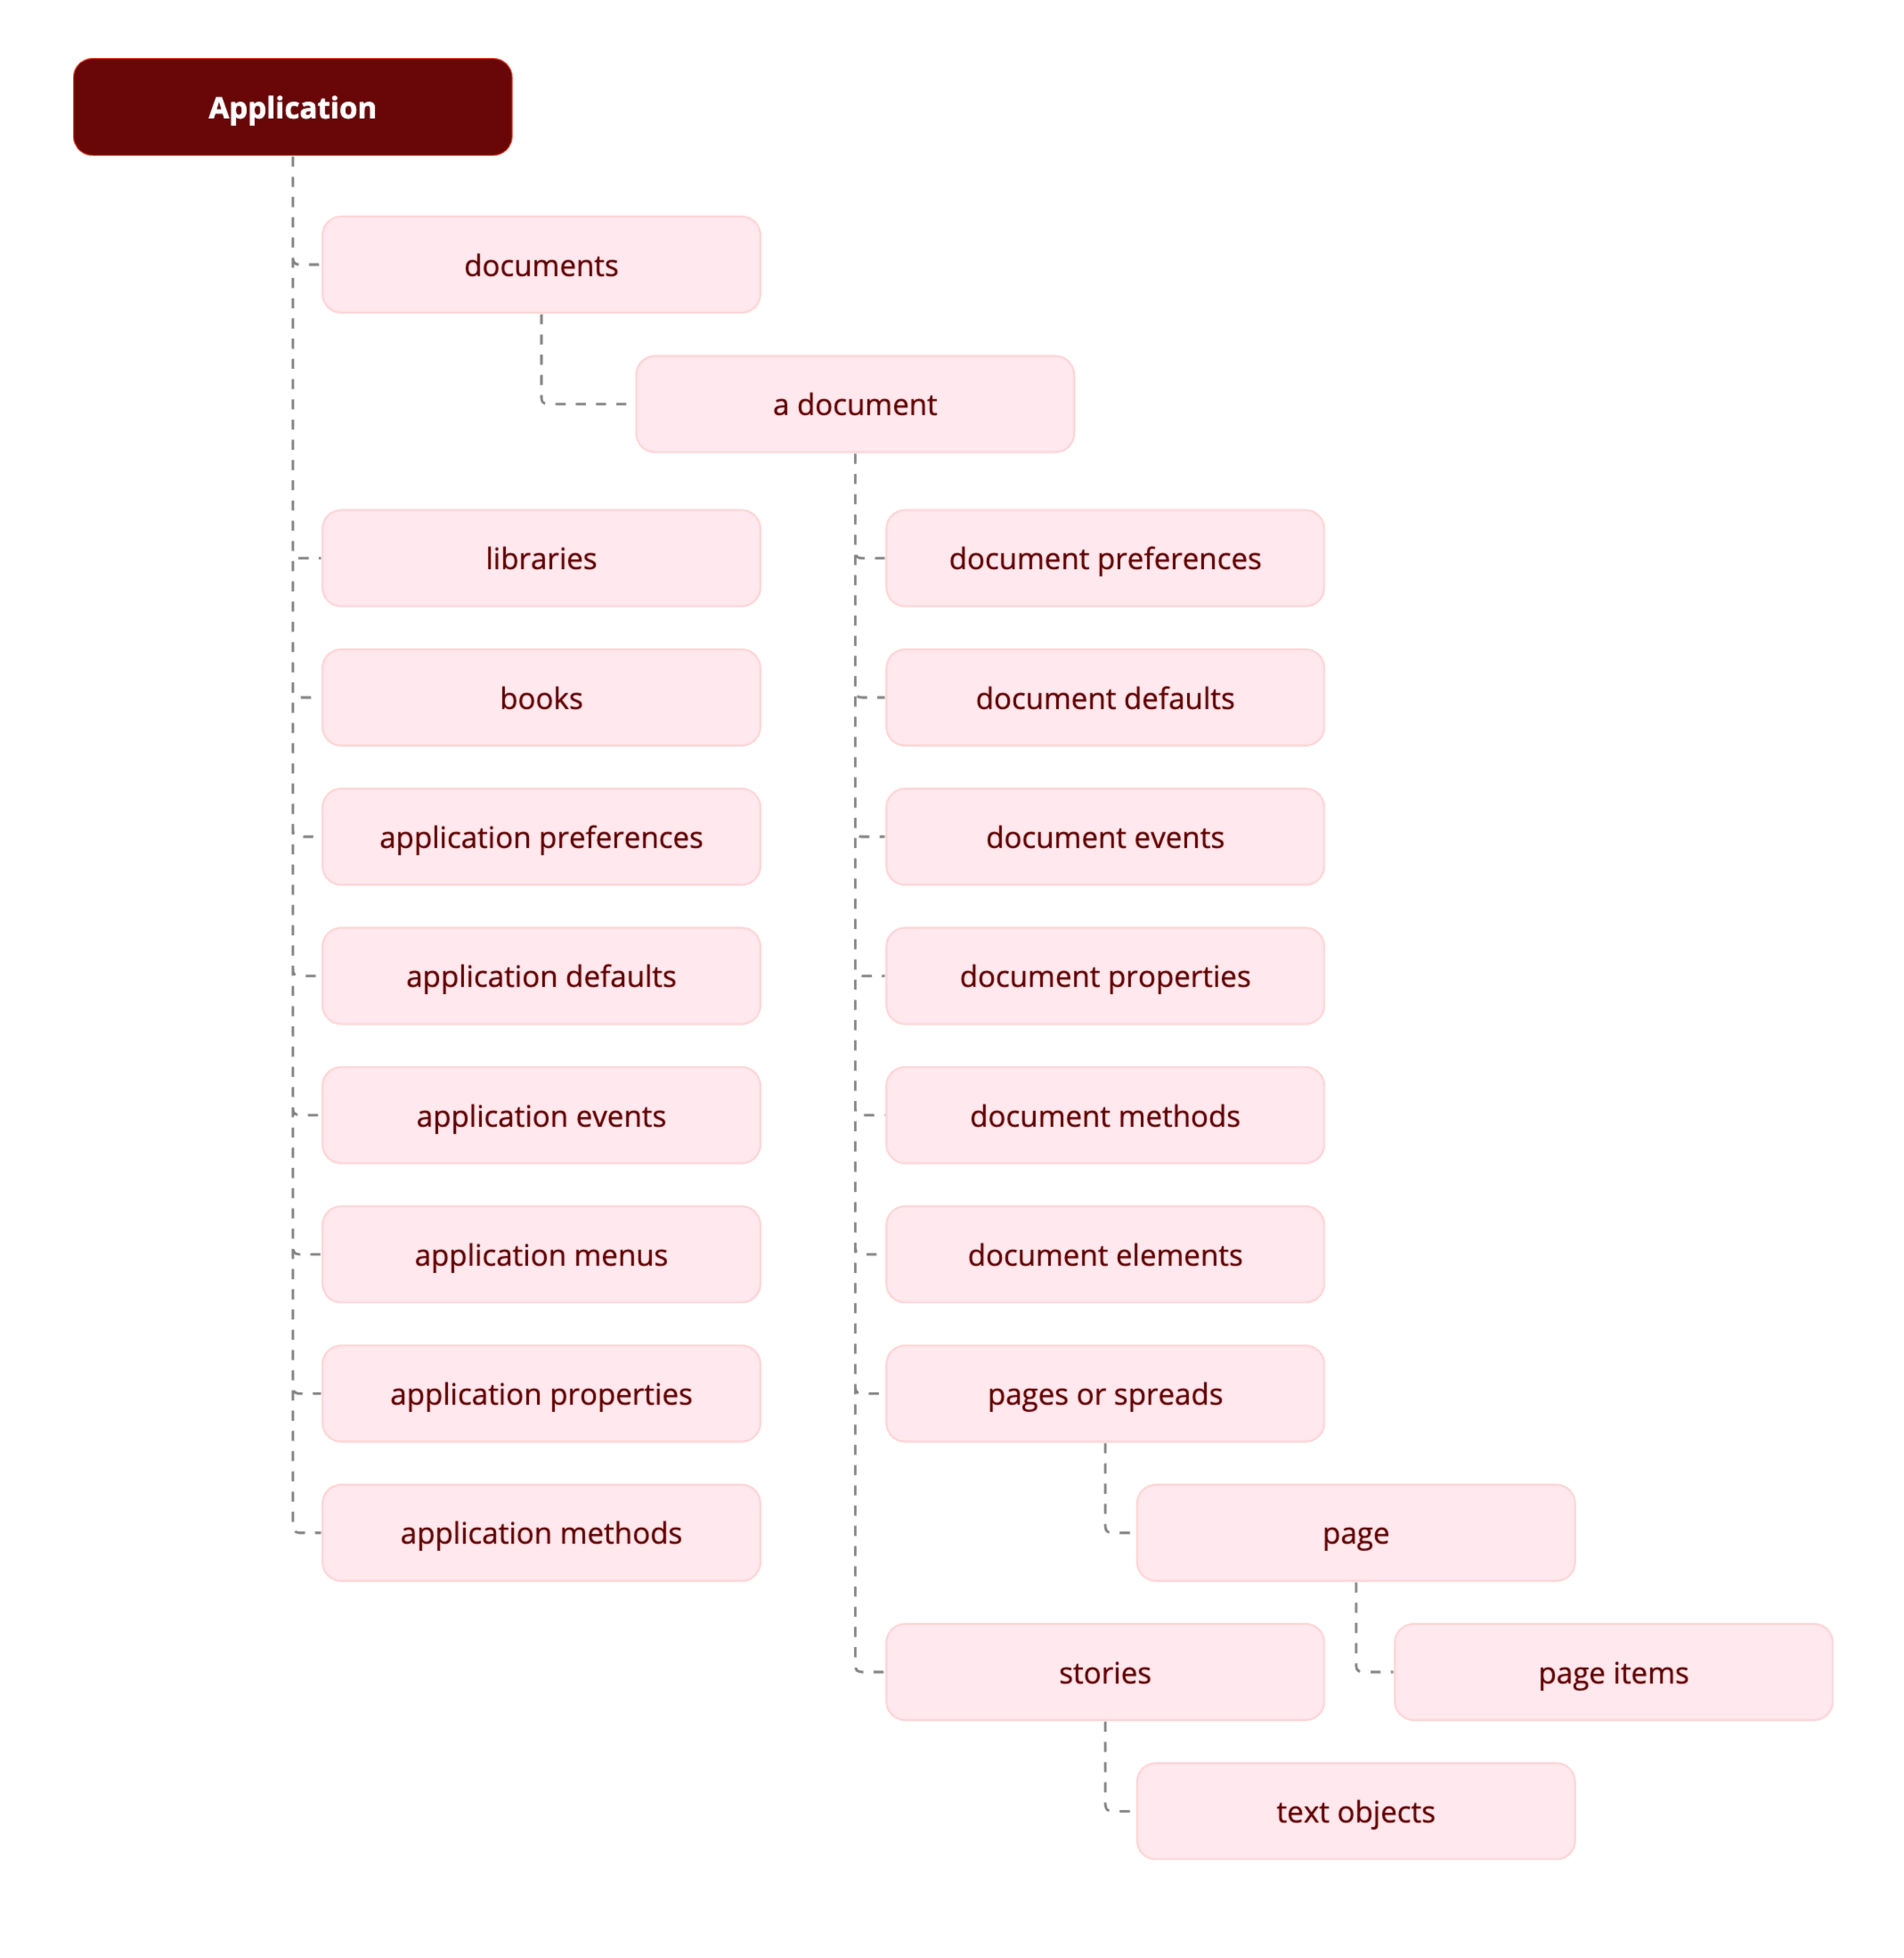
InDesign Document Object Model
const myInDesign = require("indesign");

                            const app = myInDesign.app;
https://developer.adobe.com/indesign/uxp/static/90109b1accdcec4bb3d4bed4275e08c6/d5269/id-om.webp
let doc = app.activeDocument;
app.documents.add();
doc.pages;
                            doc.pages.length;
add an entrypoint for the panel functions
entrypoints.setup({
                                commands: {
                                    showAlert: () => showAlert()
                                },
                                panels: {
                                    showPanel: {
                                        show({node} = {}) {
                                            const btn = document.querySelector('#btnCreateText');
                                            if (btn) {
                                                btn.addEventListener('click', createText);
                                            }
                                        }
                                    }
                                }
                            });
This is an event listener for the button;
    page = doc.layoutWindows.item(0).activePage;
                                const bounds = [12 + counter, 12, 72 + counter, 200]; // top, left, bottom, right in points (shifted down by counter)
                                counter = counter + 10;
                                const textFrame = page.textFrames.add({ geometricBounds: bounds });
                                textFrame.contents = "hello world";
 const rect = page.rectangles.add({ geometricBounds: bounds });
                            rect.strokeWeight = 2;
####
    // add a new page to the document
                                const newPage = doc.pages.add();
                                // make the new page the active page in the layout window
                                doc.layoutWindows.item(0).activePage = newPage
const p = doc.pages.item(i);
      for (let i = 0; i < doc.pages.length; i++) {
                                    console.log(i)
                                    const p = doc.pages.item(i);
                                    const pageBounds = p.bounds;
                                    const leftMargin = pageBounds[1] + 12;
                                    const bounds = [12 + counter, leftMargin, 72 + counter, leftMargin + 188];
                                    const textFrameOnPage = p.textFrames.add({ geometricBounds: bounds });
                                    textFrameOnPage.contents = String(i);
                                }
The bounds of the Page, in the format [y1, x1, y2, x2].
Official Tutorial:
https://developer.adobe.com/indesign/uxp/plugins/getting-started/
InDesign DOM Api
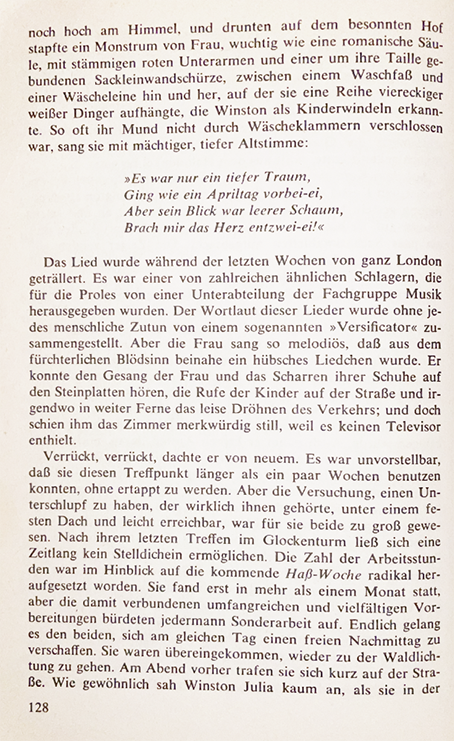
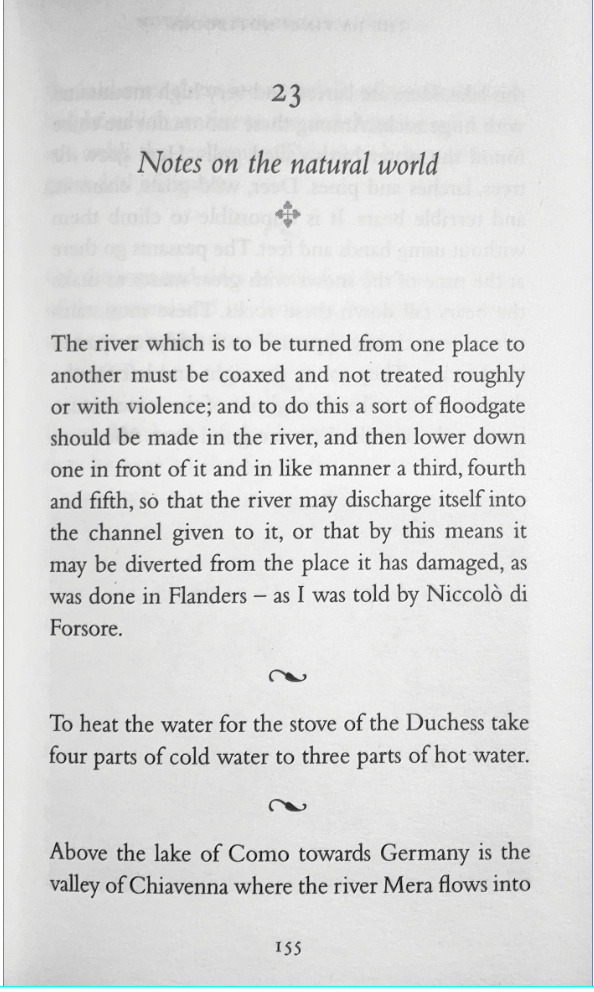
Take an essay from Library of Artistic Print on Demand and at least 4 examples from the book.
Rebind it.
Read the text and prepare 4-5 slides on the most important insights from the essay, make it accessible to others.
Why is print on demand interesting?
How does print on demand work?
How can print on demand be used artistically and creatively?
Think about how you could implement a print on demand project (within the infrastructure of the university) and how it could be implemented creatively.

Please work in GROUPS OF TWO to design a DIN A1 poster (digital only) using a new tool of your choice on the topic: Design = System.
Please use at least one of the following readings as a reference and then explain what you have taken from the reference.
Design: almost automatic.
Please roll the dice for the most important design parameters:
Please bring two to three layouts per person as a group in a PDF file. (always roll the dice again :)
Use the Text and the Rules you formulated in the last exercise and make a booklet using only paged.js.
Zines are raw, rebellious, and deeply personal—so why not bind them with the same spirit? Whether you’re stitching, stapling, or folding, the way you bind your zine can turn it into an object of art, a tactile experience, or a pocket-sized manifesto.
For quick and dirty, a simple staple down the spine does the trick—no frills, just function. Want something sturdier? Try saddle-stitching with thread and a needle, giving your zine a handmade, artisanal touch. Or go rogue with Japanese stab binding, where colorful threads crisscross the spine like a tiny work of art.
No rules, just tools: scissors, glue, awls, or even washi tape. The best zine bindings are the ones that feel yours—whether that’s messy, minimalist, or somewhere in between. So grab your stack of printed pages and get binding—your zine deserves to be held, flipped, and shared in the real world.
(Bonus: A well-bound zine lasts longer, travels farther, and feels like a secret handshake between you and your readers.)
!disclaimer! The printing functions of browsers are often still uncared-for, buggy and imprecise, so be prepared for glitches and paradox situations.
Examples:
https://www.postdigitalgraphicdesign.com/interview/0/pdgd-itw-raphaelbastide/
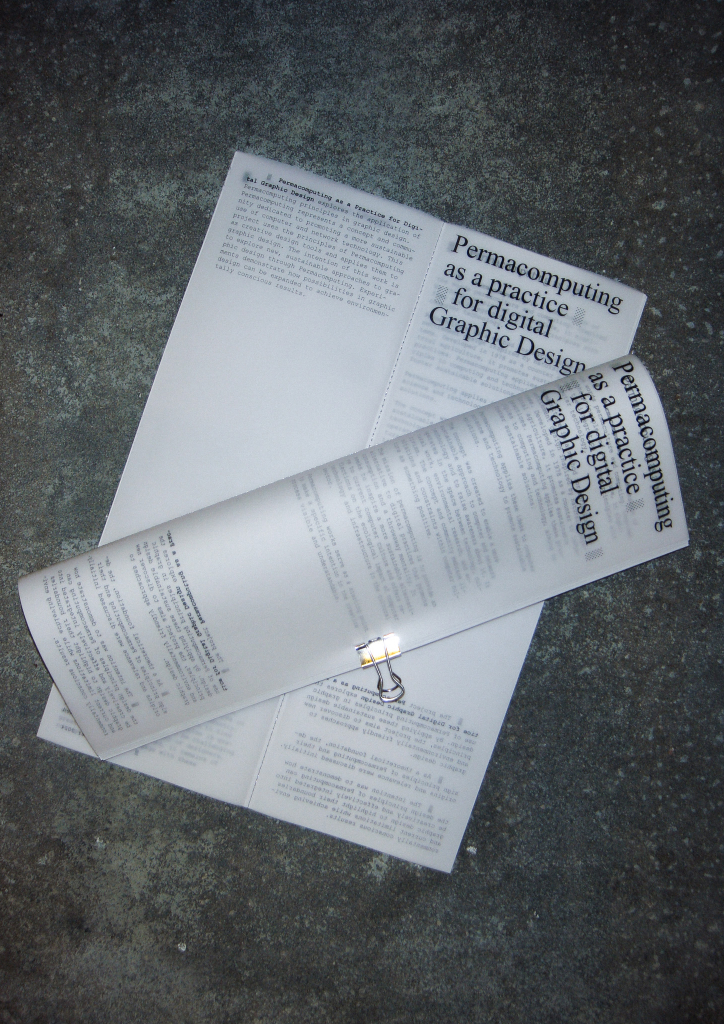
https://permacomputingasapracticefordigitalgraphicdesign.com/
Frameworks:
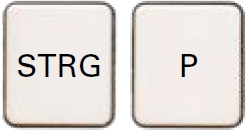
CMD+P
CSS page rules: https://developer.mozilla.org/en-US/docs/Web/CSS/@page
bindery.js https://bindery.info/
A laptop + internet connection
browser (preferably Chrome)
text editor (e.g. Visual Studio Code)
live-server (e.g. Visual Studio Code plugin: live server by Ritwick Dey)
Cline Extension for AI assistance
Paged.js is a free and open source JavaScript library that paginates content in the browser to create PDF output from any HTML content. This means you can design works for print (eg. books) using HTML and CSS!
Paged.js follows the Paged Media standards published by the W3C (ie the Paged Media Module, and the Generated Content for Paged Media Module). In effect Paged.js acts as a polyfill) for the CSS modules to print content using features that are not yet natively supported by browsers.
Open Visual Studio Code (VSC)
Create a project folder on your hard drive
Open that folder in VSC
create a new index.html and style.css
in the index.html use ! (Emmet) to create a basic HTML file
link the style.css in the head of the HTML using \
test by launching the server
Let's look at the documentation: https://pagedjs.org/en/documentation/
Download the latest version of paged js:
https://unpkg.com/pagedjs@0.4.3/dist/paged.polyfill.js
+ download the interface.css stylesheet from: https://gitlab.coko.foundation/pagedjs/interface-polyfill
Put those files in you project folder and include
<script
                            src="js/paged.polyfill.js"></script>
<link href="css/interface.css"
                            rel="stylesheet" type="text/css"
                            />
in the HTML head.
🙌 Great, we are ready for our first book layout
To print the pdf do the following (from the paged.js documentation):
Click on the “Print” button of your browser. (It will most likely be in File > Print or, on your keyboard, CTRL/CMD + P)
The styling of pages can now be altered by using the @page rules in the css as well as @media print media queries (you might know this from responsive design: @media screen and (min-width: 900px) for instance)
General settings for the page:
@page {
                        size: A5;
                        margin-top: 10mm;
                        margin-bottom: 10mm;
                        font-family: 'Franklin Gothic Medium', 'Arial Narrow', Arial, sans-serif;

                        @bottom-left {
                            content: counter(page);
                        }
                    }
Options for left and right page:
    @page:left {
                        margin-left: 10mm;
                        margin-right: 20mm;
                        @top-left {
                            content: "Chapter";
                        }
                    }

                    @page:right {
                        margin-left: 20mm;
                        margin-right: 10mm;

                        @top-right {
                            content: "Hybrid Publishing";
                        }
                    }
In the @media print query we can include all the styles that we want ONLY to appear in the print
@media print {
                        html, body {
                            height: 99vh;
                            margin: 0;
                            padding: 0;
                          }
                }
To avoid loading the print preview already on the first load we can include the following little script:
<script>
                        window.PagedConfig = {
                                auto: false
                        };
                </script>
! before the script include (<script
src="js/paged.polyfill.js"></script>)
and then create a button to call the preview:
<button class="noprint"
                            onclick="preview()">print
                            preview</button>
<script>
                //this will load paged.js and generate the PDF preview
                function preview(){
                        window.PagedPolyfill.preview();
                }
                </script>
with the noprint class we can hide elements
in the print version in @media print
.noprint{
                        display: none;
                }
Paged.js breaks the HTML content into multiple pages.
With CSS properties we can control that flow.
.chapter
                {
                break-before: page;
                }
to break the page before every
.chapterelement
Setting bleeds:
@page    {
                    bleed: 6mm;
                }
Setting up crop marks:
@page {
                    marks: crop;
                }
Add content before:
.note::before {
                    content: "Note: ";
                }
counters: (e.g. for counting images)
body {
                    counter-reset: figureNumber;
                }

                figcaption {
                    counter-increment: figureNumber;
                }

                figcaption::before {
                    content: counter(figureNumber);
                }
generated images:
.glossary::after {
                    content: " " url("/images/glossary-icon.png");
                }
showing links:
a::after {
                    content: " (" attr(href) ")";
                }
Running title with header:
h3 {
                    string-set: title content(text);
                }

                @page {
                    @bottom-center {
                        content: string(title);
                    }
                }
page templates
.frontmatter {
                        page: frontmatterLayout;
                }

                @page frontmatterLayout {
                        /* specifics rules for the frontmatter*/
                }
select specific page
@page:nth(5){
                }
Creating a table of contents is a bit more tricky, but doable with some JS / CSS:
https://pagedjs.org/posts/en/build-a-table-of-contents-from-your-html/
Building an index:
https://pagedjs.org/posts/en/build-an-index-with-pagedjs/
Parallel flows:
https://pagedjs.org/posts/en/parallel-flows-within-paged.js/
Cross references:
https://pagedjs.org/en/documentation/-cross-references/
Experiment with CSS styles and content ~
Many more options can be found in the reference: https://pagedjs.org/en/documentation/
Download the imposition.js: https://gitlab.coko.foundation/pagedjs/pagedjs-plugins/booklet-imposition/-/raw/master/imposition.js?ref_type=heads\&inline=false
Include in the index.html (! after the paged.js script):
<script
                            src="js/imposition.js"></script>
In the CSS under @page add the following:
--paged-layout: booklet;
Now if you click CMD+P the layout should be layouted as a booklet and ready to print!
https://prepostprint.org/ – great library with examples of web2print
https://networkcultures.org/goinghybrid/2022/10/03/relevant-tools-practices-in-hybrid-publishing/
https://www.archivesites.org/2021/11/29/publishing-practices/
https://pagedjs.org/posts/en/parallel-flows-within-paged.js/
What rules were found?
How are the rules formulated?
-> Possible corrections
Special text passages are set in bold
Stage directions are set in italics.
Code blocks of any programming language are set in any blackletter font
Names are set in small caps.
There is a blank page before each chapter.
Different text alignment and deliberate asymmetry between the left and right pages.
There are no page numbers on blank pages.
Instead of blank spaces, the gaps are replaced with design elements ( -, _, /,|, *, etc).
Captions are placed above the image on the left without line spacing.
The caption is always placed opposite the image in the margin column on the double page, aligned at the top with the type area.
Chapter titles refer to a period of time to which the information belongs, e.g., year xxxx, week x, hour/minute/second XX.
All chapter headings are set in color.
Column titles are centered on the center axis below the page margin at the same height as the page number and in a smaller font size than the body text, with a consistent distance from the footer.
Column titles are positioned vertically in the inner margin, flush with the top of the type area. Left from bottom to top, right from top to bottom.
The first line of each new paragraph is indented to the right. However, the first paragraph of a chapter has no indentation.
Indents are distinguished by a different color in the typography.
The footnotes extend flush from the bottom into the page. The text grows upwards.
The footnote is set in italics.
The footnotes are smaller than the body text.
Justified text is only used for direct speech, otherwise block text is used.
Never use more than two fonts.
All texts, headings, page numbers, etc. are set in the same font size and font type.
The text flows within a non-rectangular graphic shape
Graphic symbols are used as punctuation marks in the body text.
Graphic motifs are visual elements that are repeatedly used by brands or designs. To maintain a sense of unity throughout the image, do not use them in a size that is too large or too small.
The font sizes and styles are determined by the hierarchy of the content: heading > subheading > body text > footnotes
The layout follows a grid with 6 rows and 4 columns
Always place the heading in large letters below the body text
Place the heading on the left-hand page at the right-hand margin and the heading on the right-hand page at the left-hand margin.
Chapter numbers and titles are indented to different degrees.
When using a sans-serif typeface, emphasis is applied with a serif typeface.
(When using a sans-serif typeface, emphasis is applied with a serif typeface.)
Full-page illustrations are used without page numbers.
The illustrations are not included in the type area.
Pages that are completely filled with an image do not have page numbers.
Initials are placed at the beginning of a body text, after the start of a new chapter.
Initials are illustrated at the beginning of each new chapter.
Initials as a decorative element at the beginning of a chapter.
The lines of justified text are slightly offset and the space between them is no greater than the space between words.
The text leaves the justified text and extends beyond the center into the column of the other justified text.
List items are inserted into lists and begin with a +, followed by the text content without spacing.
Names of people or characters are mirrored on the X-axis.
Names that indicate the acting character are set in small caps
Numbering is set in a different font style.
An ornament is positioned centered after each paragraph
Ornaments border the type area
Open capitals (with outlines) only work in large fonts.
The page number is always 2 cm below the bottom of the type area. If there is no text on the page, the page number is at the top.
The page number always appears 15 times on a page. They are always in the same grid (3x5).
The page number always appears on the left-hand side of a double page.
The page number is centered at the bottom and is cut off horizontally due to the book edge.
Points (.) are underlined.
are in a different color than the body text
French quotation marks are used. “Quote.”
French quotation marks are used the other way around. «Quote».
Cross-references are colored blue and underlined. The glyph ⤴ is inserted at the end of the text content.
The reading direction may vary.
All texts are rotated by 9°.
Each sentence begins with a dash. — Like this.
Everything is written in small letters.
The type area for continuous text is located exclusively on the right-hand pages with a single outer margin and a 6.5-fold gutter margin.
Symmetrical double-page layout with wide outer margin.
The type area is rotated 90 degrees counterclockwise.
Individual words leave the type area and are arranged according to other rules.
The type area is not symmetrical, e.g., always on the left.
Uniform page margins for a calm layout.
The title on the cover is not horizontal and is not centered.
The title is printed again in black on the first page of the book.
Font size does not follow a fixed structure - RANDOM
Divide the page into two columns. The original text is in the left column, the translation directly next to it in the right column.
Each line of verse begins with the verse number. The text content of the verse is inserted, followed by a blank line.
Vertical forms and text appear compressed to the human eye and therefore require a larger character spacing (+2pt) than horizontal text and forms.
Comic texts are set in versal letters.
Headings, column titles, and introductory texts are set in uppercase letters.
All vowels are changed with umlaut variations (also possible with consonants).
White space is deliberately used as a design element
Direct speech is set with a line break and the first line is indented.
The position of the type area is calculated using the x-height of the font
All speakers are assigned a unique color, and quotations/reproductions of spoken words are set in the respective color
Inconsistent line spacing in the same typeface
Quotations are set in italics and extend 10 cm beyond the type area.
Please look at (individual work) contemporary and antiquarian books and distill from your findings at least three conventional and three unconventional rules from microtypography (typesetting, detail typography, orthotypography) and macrotypography (layout).
Please scan or photograph these findings and print them out in black and white on A3 paper.
Please write down the rule—as short as possible, as long as necessary— as a single line on the A3 paper below the image.
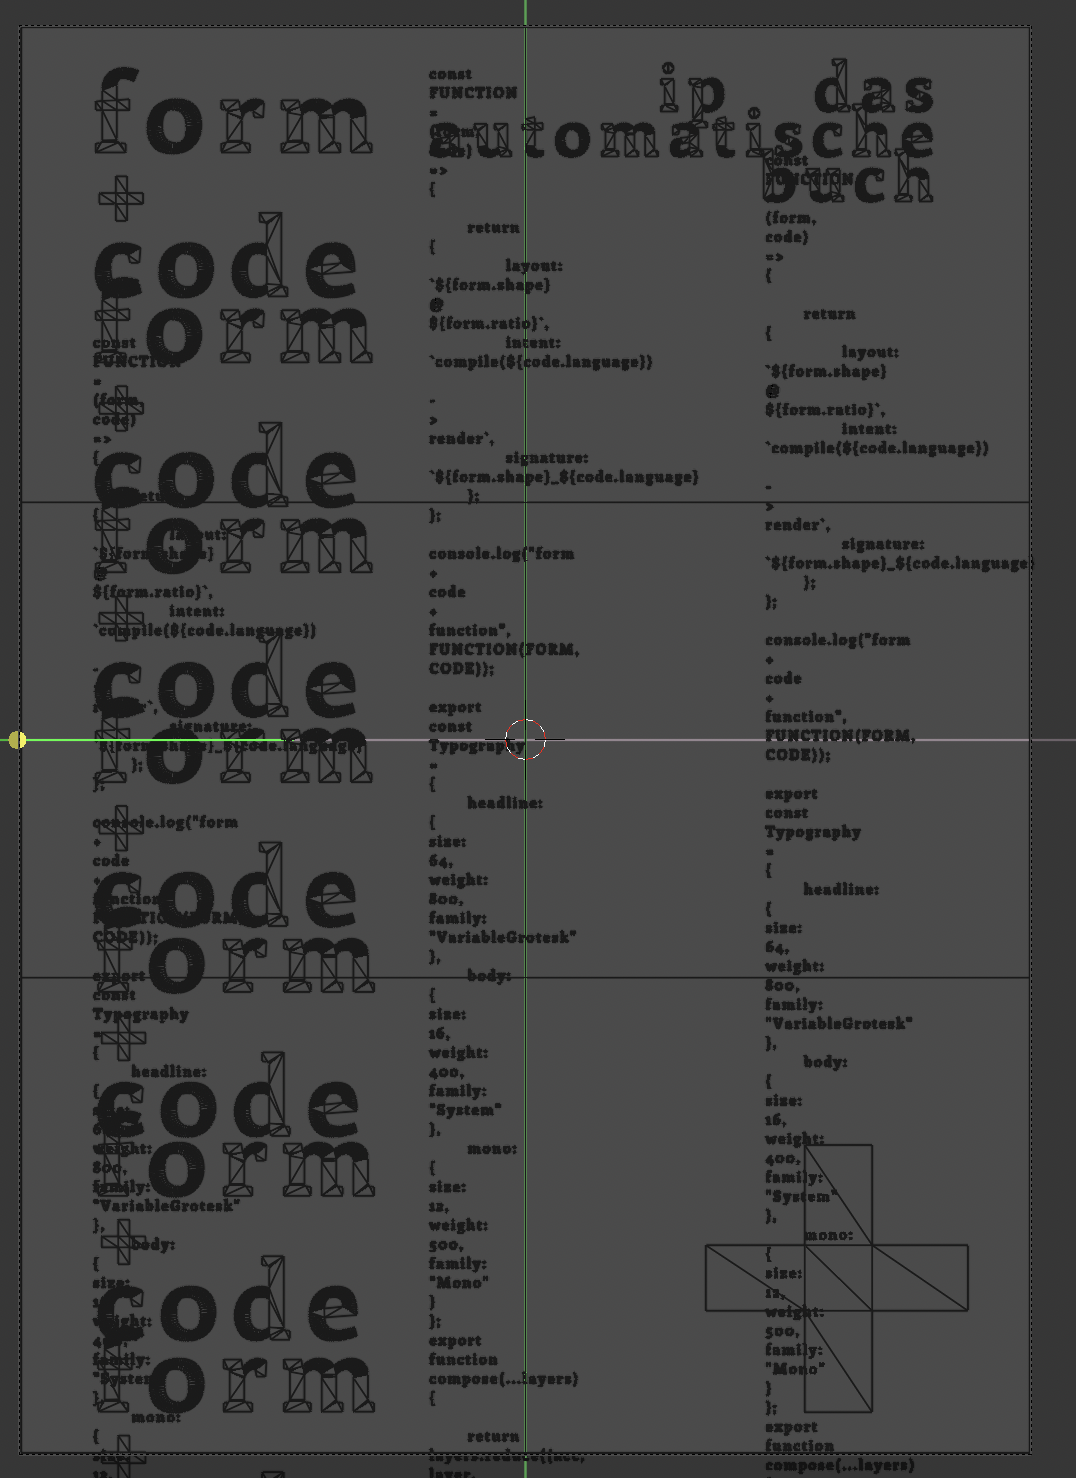
Johannes Bergerhausen & Alexander Roidl
In this seminar, we examine the constitution of the book
under the conditions of automated processes. What design
is appropriate for current knowledge production today?
Automation has shaped book design since Gutenberg: from
lead typesetting, which determined font sizes and grids,
to phototypesetting and desktop publishing, which opened
up new freedoms but was also shaped by grid principles
and software logic.
For centuries, the typographic grid determined the order
of text, images, and white space—while today, digital
standards such as Unicode and EPUB define which
characters can be displayed and how texts are structured
and distributed on platforms.
Each medium and each technology brings its own logic,
structures, aesthetics (and biases). Which of these fit
with our viewing habits today? Which design rules will
still be relevant in the future?
In pairs, we analyze and question the visible and
invisible rules, systems, and algorithms of book
production and publication. In the context of current
developments such as print on demand, e.g.:
www.apod.li and
web-to-print, e.g.:
https://prepostprint.org/resources/, we explore new possibilities for algorithmic,
systematic design.
Practical experiments result in books and publications
that address, challenge, or outsmart the automation of
book design, production, and distribution. Each group
develops the “content” individually through a systematic
process according to self-imposed rules on a topic of
their choice.
Thus, it is not only about the efficient implementation
of layouts and print templates, but we also use the
formats, processes, and restrictions creatively and
artistically.
| Date | Content |
|---|---|
| 15/10 | Introduction to the topic |
| 22/10 | Systems & Book Design |
| 29/10 | Web-To-Print 1 |
| 05/11 | Web-to-print 2 |
| 12/11 | Grid / Layout / InDesign Scripting |
| 19/11 | Print On Demand |
| 26/11 | Project Idea Presentation |
| 03/12 | Compile content |
| 10/12 | Project work |
| 17/12 | Interim presentation |
| 24/12 | (Christmas) |
| 31/12 | (Christmas) |
| 07/01 | Project work |
| 14/01 | Project work / Evaluation |
| 21/01 | (BaMa colloquium week) |
| 28/01 | Final presentation |
Combination of book design and new technologies
We shape tools and therefore our tools shape us
Gutenberg / phototypesetting / DTP
Systematic approaches have been popular in layout design since the mid-20th century, when some creative designers began to design layouts based on grids and the variation of visual characteristics of typographic elements.
1960s – Rule-based design: Karl Gerstner developed combinatorial layout methods and later formalized them for computers (Compendium for Literates, 1974).
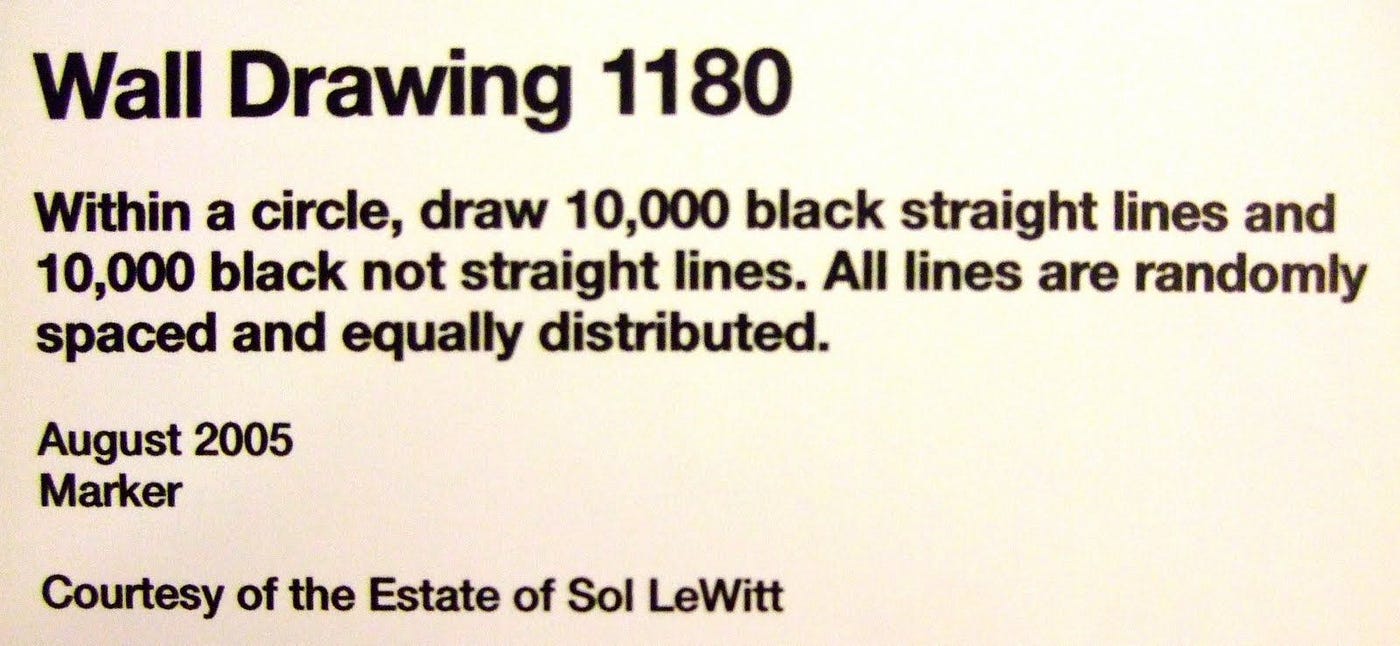
Conceptual instructions: Sol LeWitt (1971) used formal rules to design an art catalog.
Algorithmic typography: Knuth & Plass (1981) optimized page breaks; Knuth developed Metafont (1982) and TeX (1991) for parametric, structured book production.
Automated layouts: Muriel Cooper and MIT students experimented with computer-generated layouts (1980s–1990s).
Interactive books: John Maeda's Reactive Book series (1990s) dynamically controlled graphics through user input.
“Most of the questions for designers need systems as answers.” Erik van Blokland https://www.minsuneo.nyc/GRAPHIC-37-Introduction-to-Computation
Examples from HS courses
PrePostPrint Collective
Tools
paged.js
Cmd+P
Etherport
Print is not disappearing, but mutating. Digital media are changing the production, distribution, and perception of print, but print remains a culturally charged, resistant, and haptic medium. The “post-digital” publication deliberately exploits the tension between the digital and physical worlds.
New publishing practices: print-on-demand, DIY zines, risography, and digital typography
Books and magazines become cultural objects
Modularity, versioning, non-linearity: Texts and publications are designed in such a way that they can unfold, grow, and change
Collaboration, participation, and peer communities are important—readers and other stakeholders are seen not only as recipients, but as part of the process
Books are only printed when ordered → no storage costs, small print runs possible.
Flexible & experimental: individual layouts, generative designs, web-to-print.
Artistic use: POD for limited editions, curated web content, experimental books.
Artistic examples:
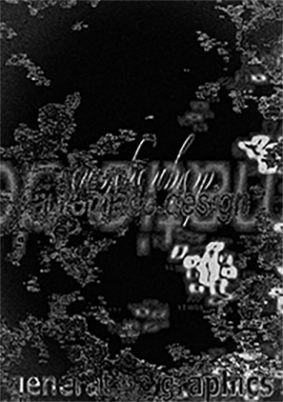
A Library of the Printed Web – Paul Soulellis
Library of artistic print on demand www.apod.li
Hybrid Publishing https://hybrid.publishing.systems/#/
KiTeGG Publikationen
https://prepostprint.org/site/templates//img/ppp.svg
https://i.ebayimg.com/images/g/o6AAAeSwobZotxFJ/s-l300.jpg
https://miro.medium.com/v2/resize:fit:1400/0*FXAwV-uGAF4i58o1.jpg?
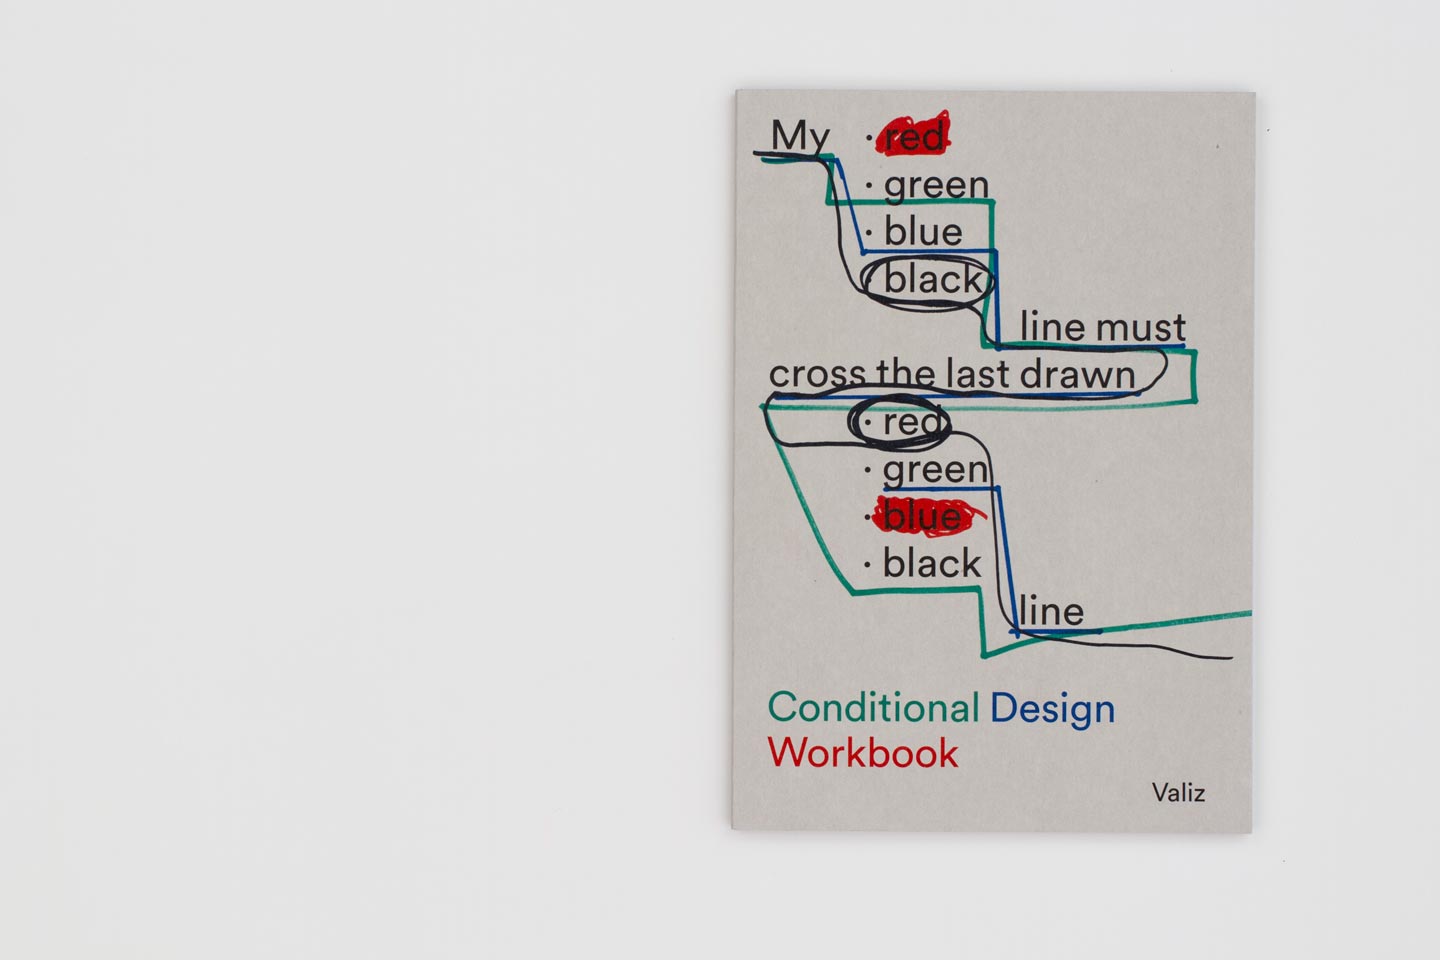
https://workbook.conditionaldesign.org/retina/book_ret_1.jpg?
http://www.generative-gestaltung.de/
https://type.hanli.eu/typepad-manual/
https://office-roxx.de/wp-content/uploads/2022/06/STRG-P.jpg?
https://cc.vvvvvvaria.org/wiki/images/thumb/a/ab/01-toolsshape.png/400px-01-toolsshape.png?
https://hybrid.publishing.systems/#/
https://unlearn.gestaltung.ai/de
https://timrodenbroeker.de/wp-content/uploads/2024/08/01_Coverl-1.jpg
https://cdn.shopify.com/s/files/1/0268/4407/0021/files/WEBBookImage-Environment.png
https://www.sciencedirect.com/science/article/pii/S2468502X23000037
Post-Digital Print, Alessandro Ludovico
Programme Entwerfen, Karl Gerstner
Graphic Design in the Post-Digital Age
Library of Artistic Print on Demand
Generative Gestaltung / Generative Design Buch (Hartmut Bohnacker, Benedikt Groß, Julia Laub etc.)
Library of the printed web https://printedweb.org/
Post Digital Publishing Archive: https://p-dpa.net/
Experimental Publishing Compendium https://compendium.copim.ac.uk/practices/58?utm_source=chatgpt.com
https://alternativelayoutsystem.com/publication/ (indesign skripte)
paged.js
weasyprint
etherport
p5.js
basil for InDesign Scripting https://helpx.adobe.com/content/dam/help/en/indesign/using/scripting/adobe-introduction-to-scripting.pdf
What does book design mean when layouts are no longer created page by page using manual or static layout tools?
What happens when content updates automatically, systems make decisions, and design operates through rules, structures, and algorithms?
And what role does print play when web, code, and analog techniques intersect?
This project explores the tension between automated work processes and contemporary book design. Instead of traditional layout software, the focus lies on systemic thinking, fixed rules, and networked content.
Automation enables new forms of production: content can be updated live, publications emerge from dynamic sources, and print often becomes a by-product of a larger, hybrid system.
Drawing on historical and current forms of automation—from lead typesetting to digital standards and web-to-print—the project examines both visible and invisible design rules.
Topics such as hybrid publishing, print on demand, system design, Paged.js, open source, and AI form the basis for experimental and systematic approaches.
The resulting works highlight interfaces and symbioses between web-based design and analog techniques. Print is not replaced, but recontextualized.
The publications consciously work with processes, formats, and limitations. Automation is understood not only as a tool for efficiency, but also as a creative and artistic method to reveal, question, and rethink existing systems.
The website presents all projects created during the seminar—eight different positions on automated publishing that frame and expand the course chapters. Within these chapters, the course content is reflected and complemented by exercises and selected example outcomes.
The goal is to offer readers an easy and low-threshold introduction to the topics covered in the seminar—mirroring our own learning experience.
Several processes within auto book meta pub are fully automated:
Binding instructions are included directly in the paged.js file.
auto book meta pub is also available as a printed publication.
paged.js
RISO – Mainz University of Applied Sciences
Printing & Paper – Mainz University of Applied
Sciences
Salzer EOS, 60 g/sqm
The Automatic Book
Alexander Roidl (Interim
Professorship in Communication Design)
&
Johannes Bergerhausen
(Professorship in Typography and Book Design)
Mainz University of Applied Sciences
Felix Stadler Marcos, Sophie Kunle & Annabel Scheffler